How 3D carving works#
3D Profile sweeps a round-nosed bit back and forth across a surface, lowering it to follow the model, until the wood matches.
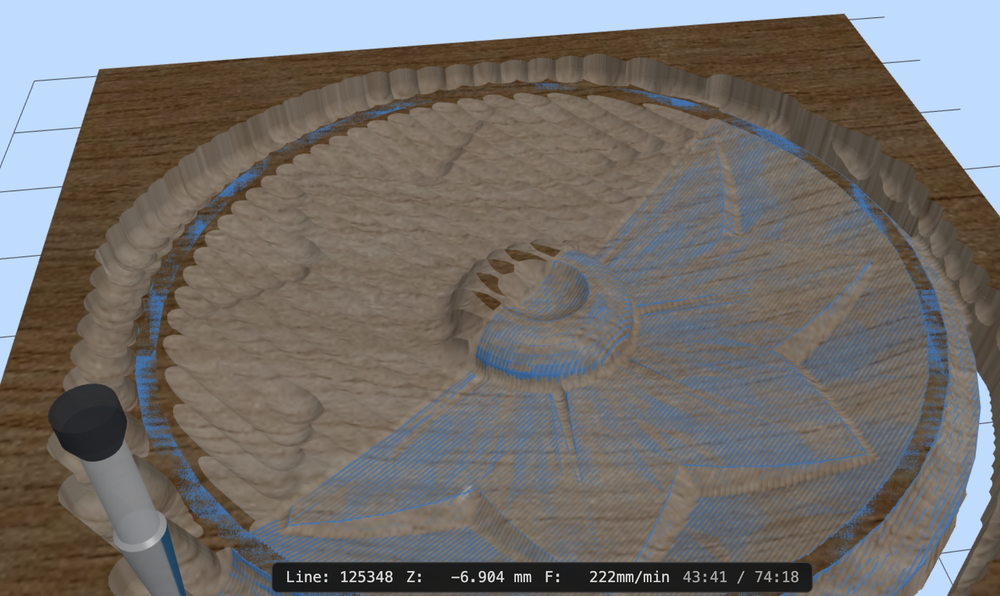
Scallops#
A round bit leaves a small ridge between passes, called a scallop.
   ╭─╮╭─╮╭─╮╭─╮     ← bit passes
  ‿‿‿‿‿‿‿‿‿‿‿‿‿    ← scallops left in the wood
Halve the stepover and the scallops get much smaller, but the job takes twice as long. That's the main trade-off in 3D work. A small bit at fine stepover can run for hours.
Roughing#
Without roughing, the small finishing bit removes everything, slowly, and wears out.
With roughing, a bigger bit clears most of the wood first and leaves a thin layer (stock allowance, 0.3 mm by default). The finishing pass then only cuts what's left. It skips areas that are already done.
An end mill is a good roughing tool when there's flat ground around the relief: it cuts the floor to its final depth straight away.
The roughing angle defaults to 90° from the finishing angle, so the finish crosses the rough marks. That gives a more even cut.
Raster or Waterline#
Raster sweeps straight lines across the model at one angle. Waterline runs round the model at a constant height instead, level by level, from each peak down to its base. A depth map can only use Raster.
What can't be carved#
The bit comes from above. Anything that overhangs itself (an undercut) can't be reached. A ball nose can't get into a hollow narrower than its own radius; the simulation shows these as flat spots.
STL sizing#
The top of the model goes at the top of the stock. Depth scales with the average of width and height scaling. Stretch it unevenly and the depth won't match either direction, so resize evenly.
Depth maps#
A depth map is a greyscale picture: white is high, black is low.
Width, height and depth are separate. The rectangle sets width and height; Relief Depth sets depth. Stretching the picture doesn't distort depth.
The background is found, not assumed. Backgrounds are rarely pure black, and JPEGs add specks. The app finds the cluster of darkest near-identical greys and cuts them all flat. The form shows the result, e.g. Background: grey 28 and below.
A picture has 256 grey levels. On a 12 mm relief, each step is under 0.05 mm, finer than the scallops.
Use PNG when you can. JPEG adds noise.
How-to: Carve a 3D model · Carve a picture in 3D